The Project
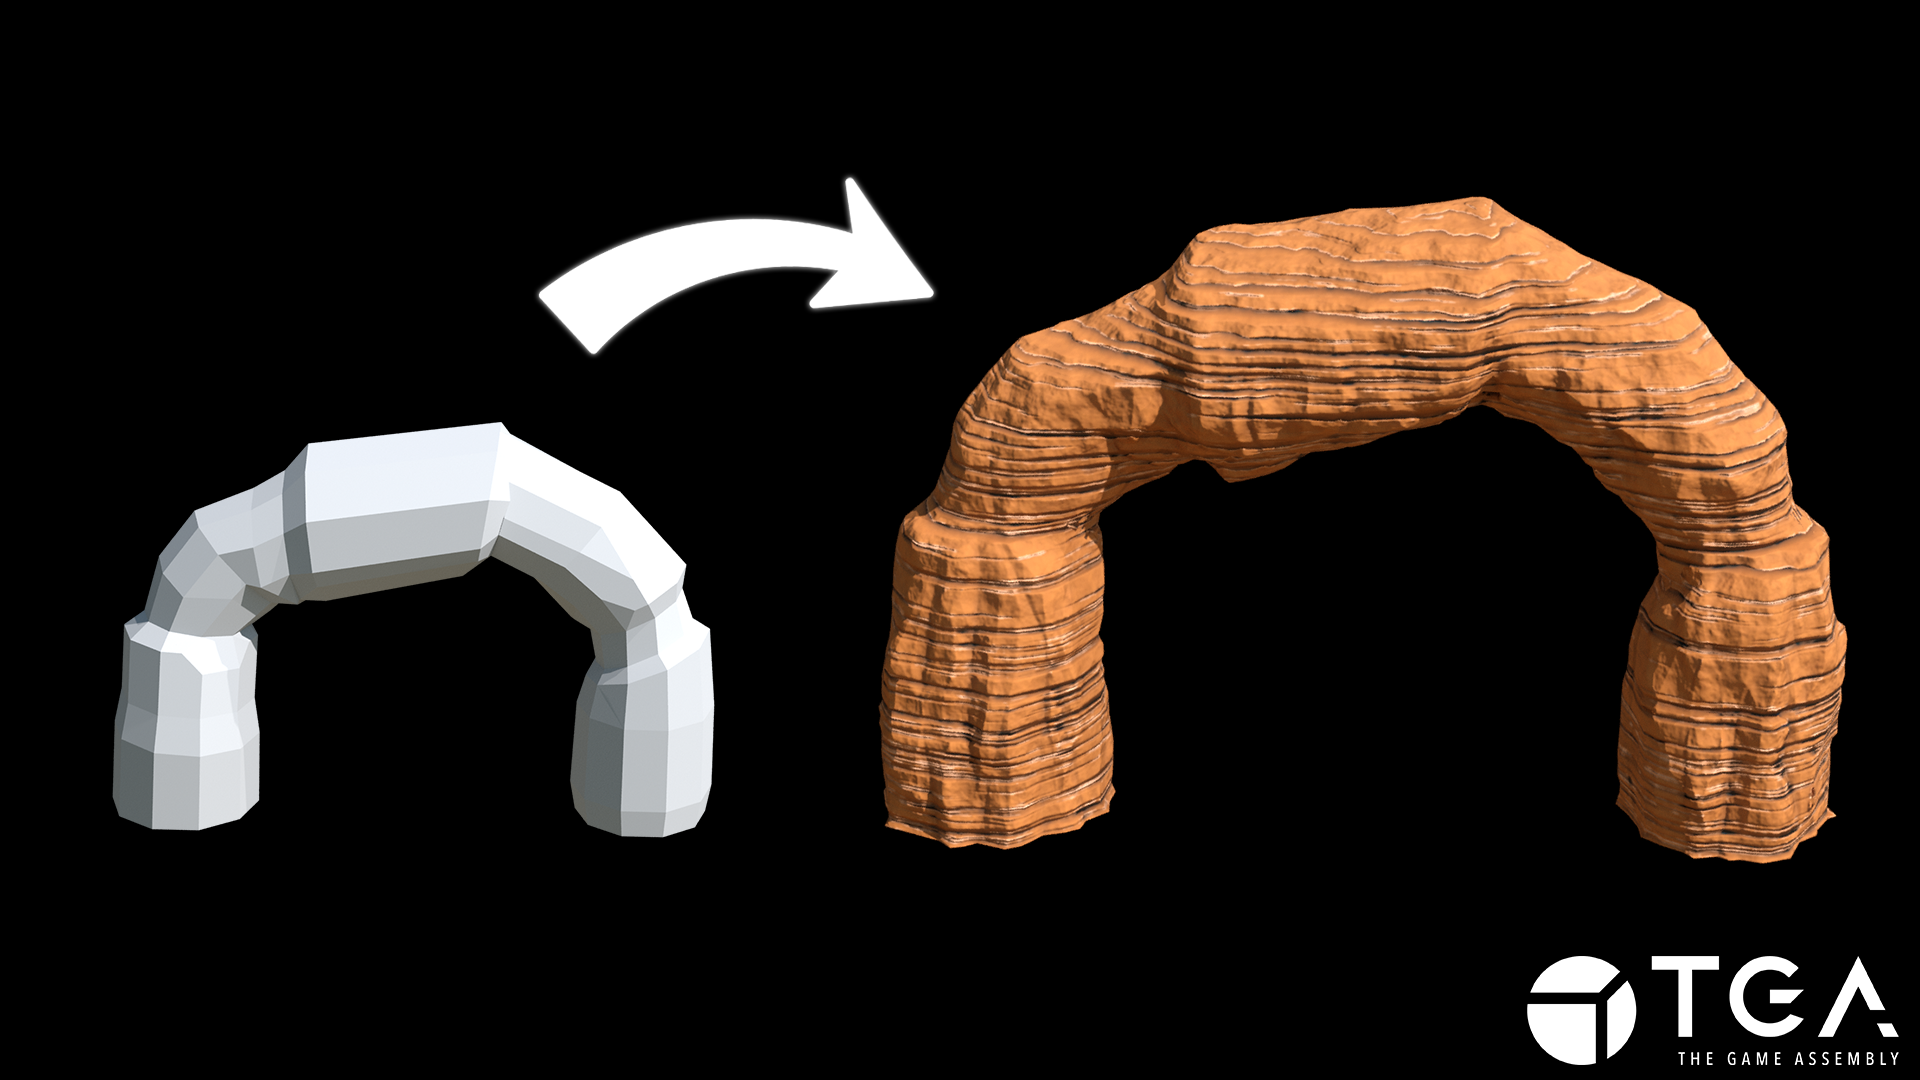
In this project, I developed a tool over the course of 4weeks that takes a block-out mesh as input and generates an optimized rock formation model with baked details, allowing users to quickly bring their levels to life.
I also wanted the tool to provide intuitive control, enabling users to efficiently create a wide range of variations of the same rock formation.
The Research
I started the project by gathering reference images of various rock formations, including some of my own photos taken in my local area. Once I had finished collecting the reference, I began researching methods for creating rocky formations. I explored several techniques, such as using tri-planar texture displacement and VDBs. Ultimately, I chose to work with VDBs, as I felt the tri-planar approach would limit my ability to achieve the desired variation and user control. Additionally, I discovered that many similar procedural rock formation tools also relied on volumes to achieve a more realistic result.
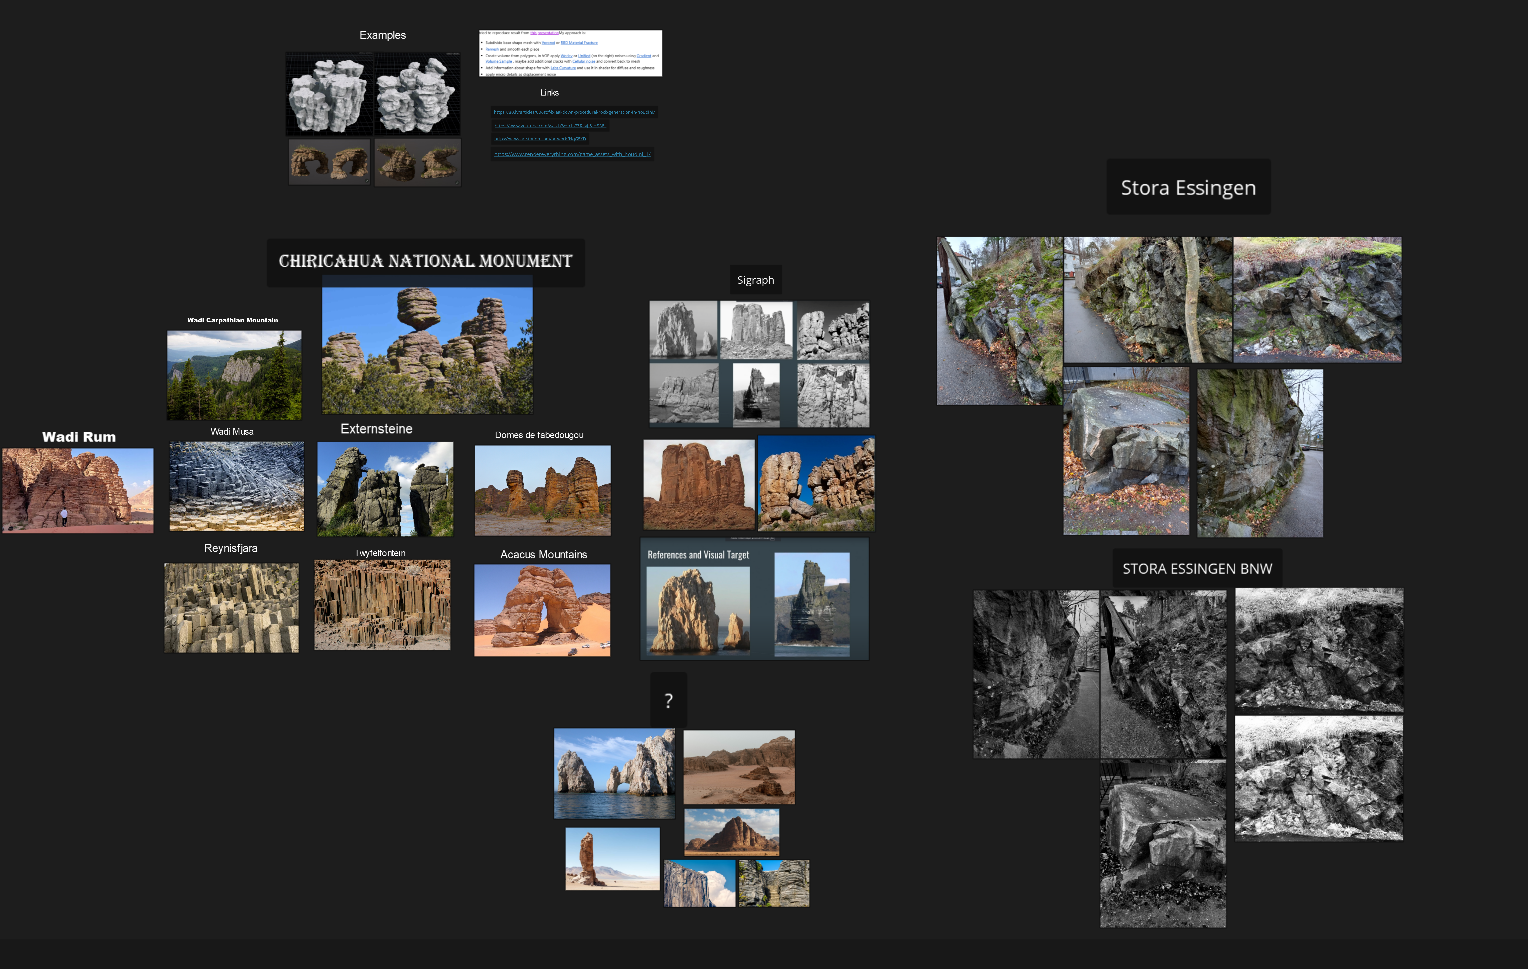
References
How it works
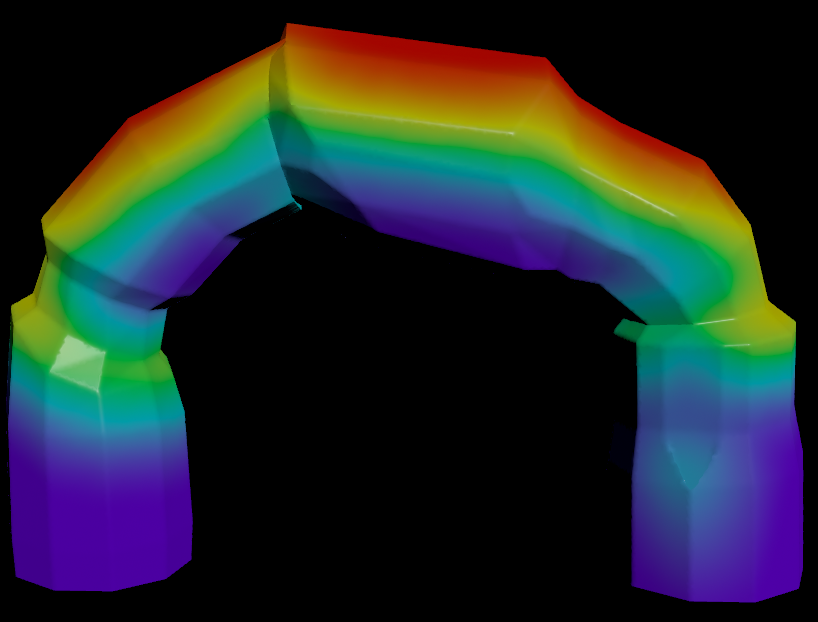
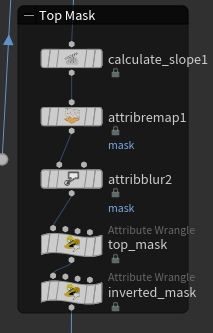
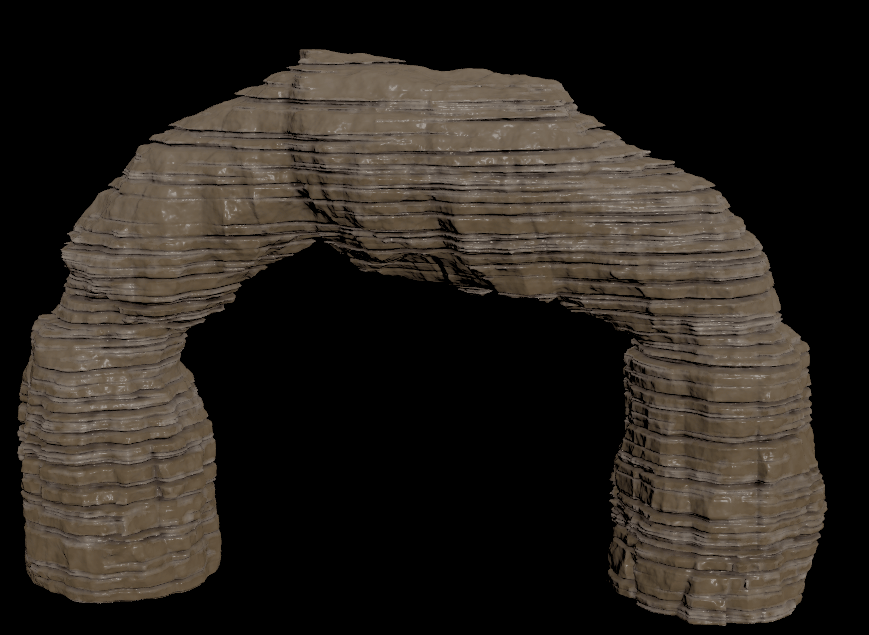
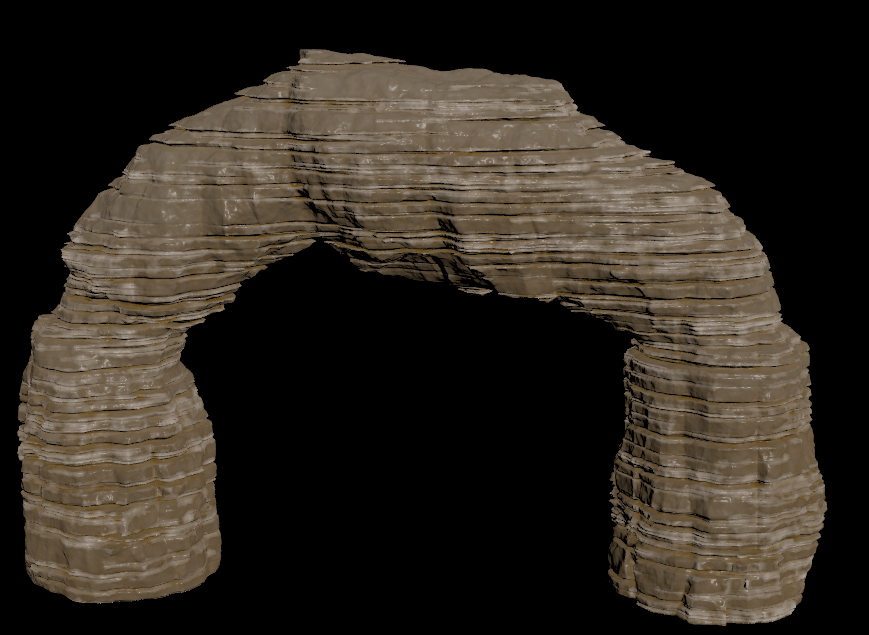
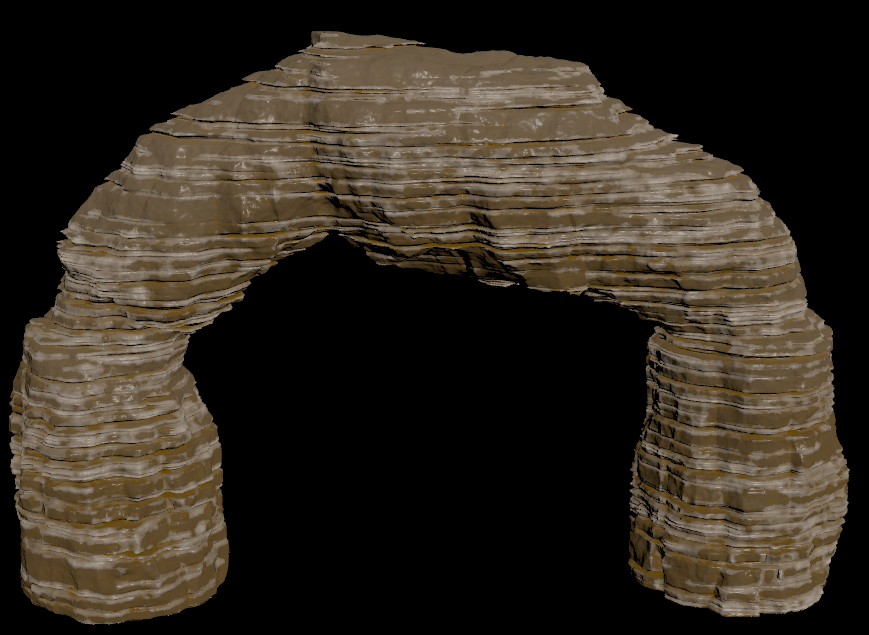
The first step was to create a top mask for the model by grouping points and assigning vertex colors to those with a positive normal Y direction. This was crucial because I needed to pass the mask as a VDB attribute to give the user control over how smooth the top of the rock formation should be. In nature, rock formations are shaped by weather conditions like rain, wind, and more. I envisioned the top of my rock formation being smoothed over many years, while the interior remained rough due to being more protected from the elements. In the future, this mask could also be used to place objects like rocks, gravel, or even plants in the masked area.
The next step was to convert our block-out mesh to a VDB within Houdini, which was easily done using the vdbfrompolygon node.
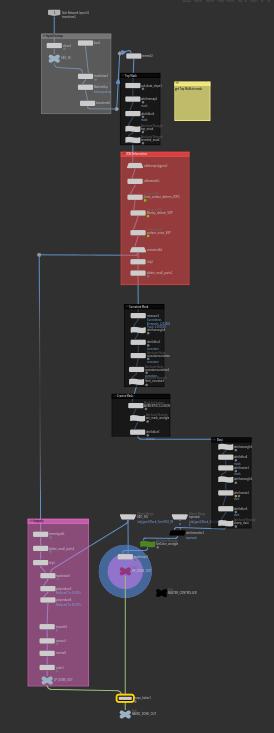
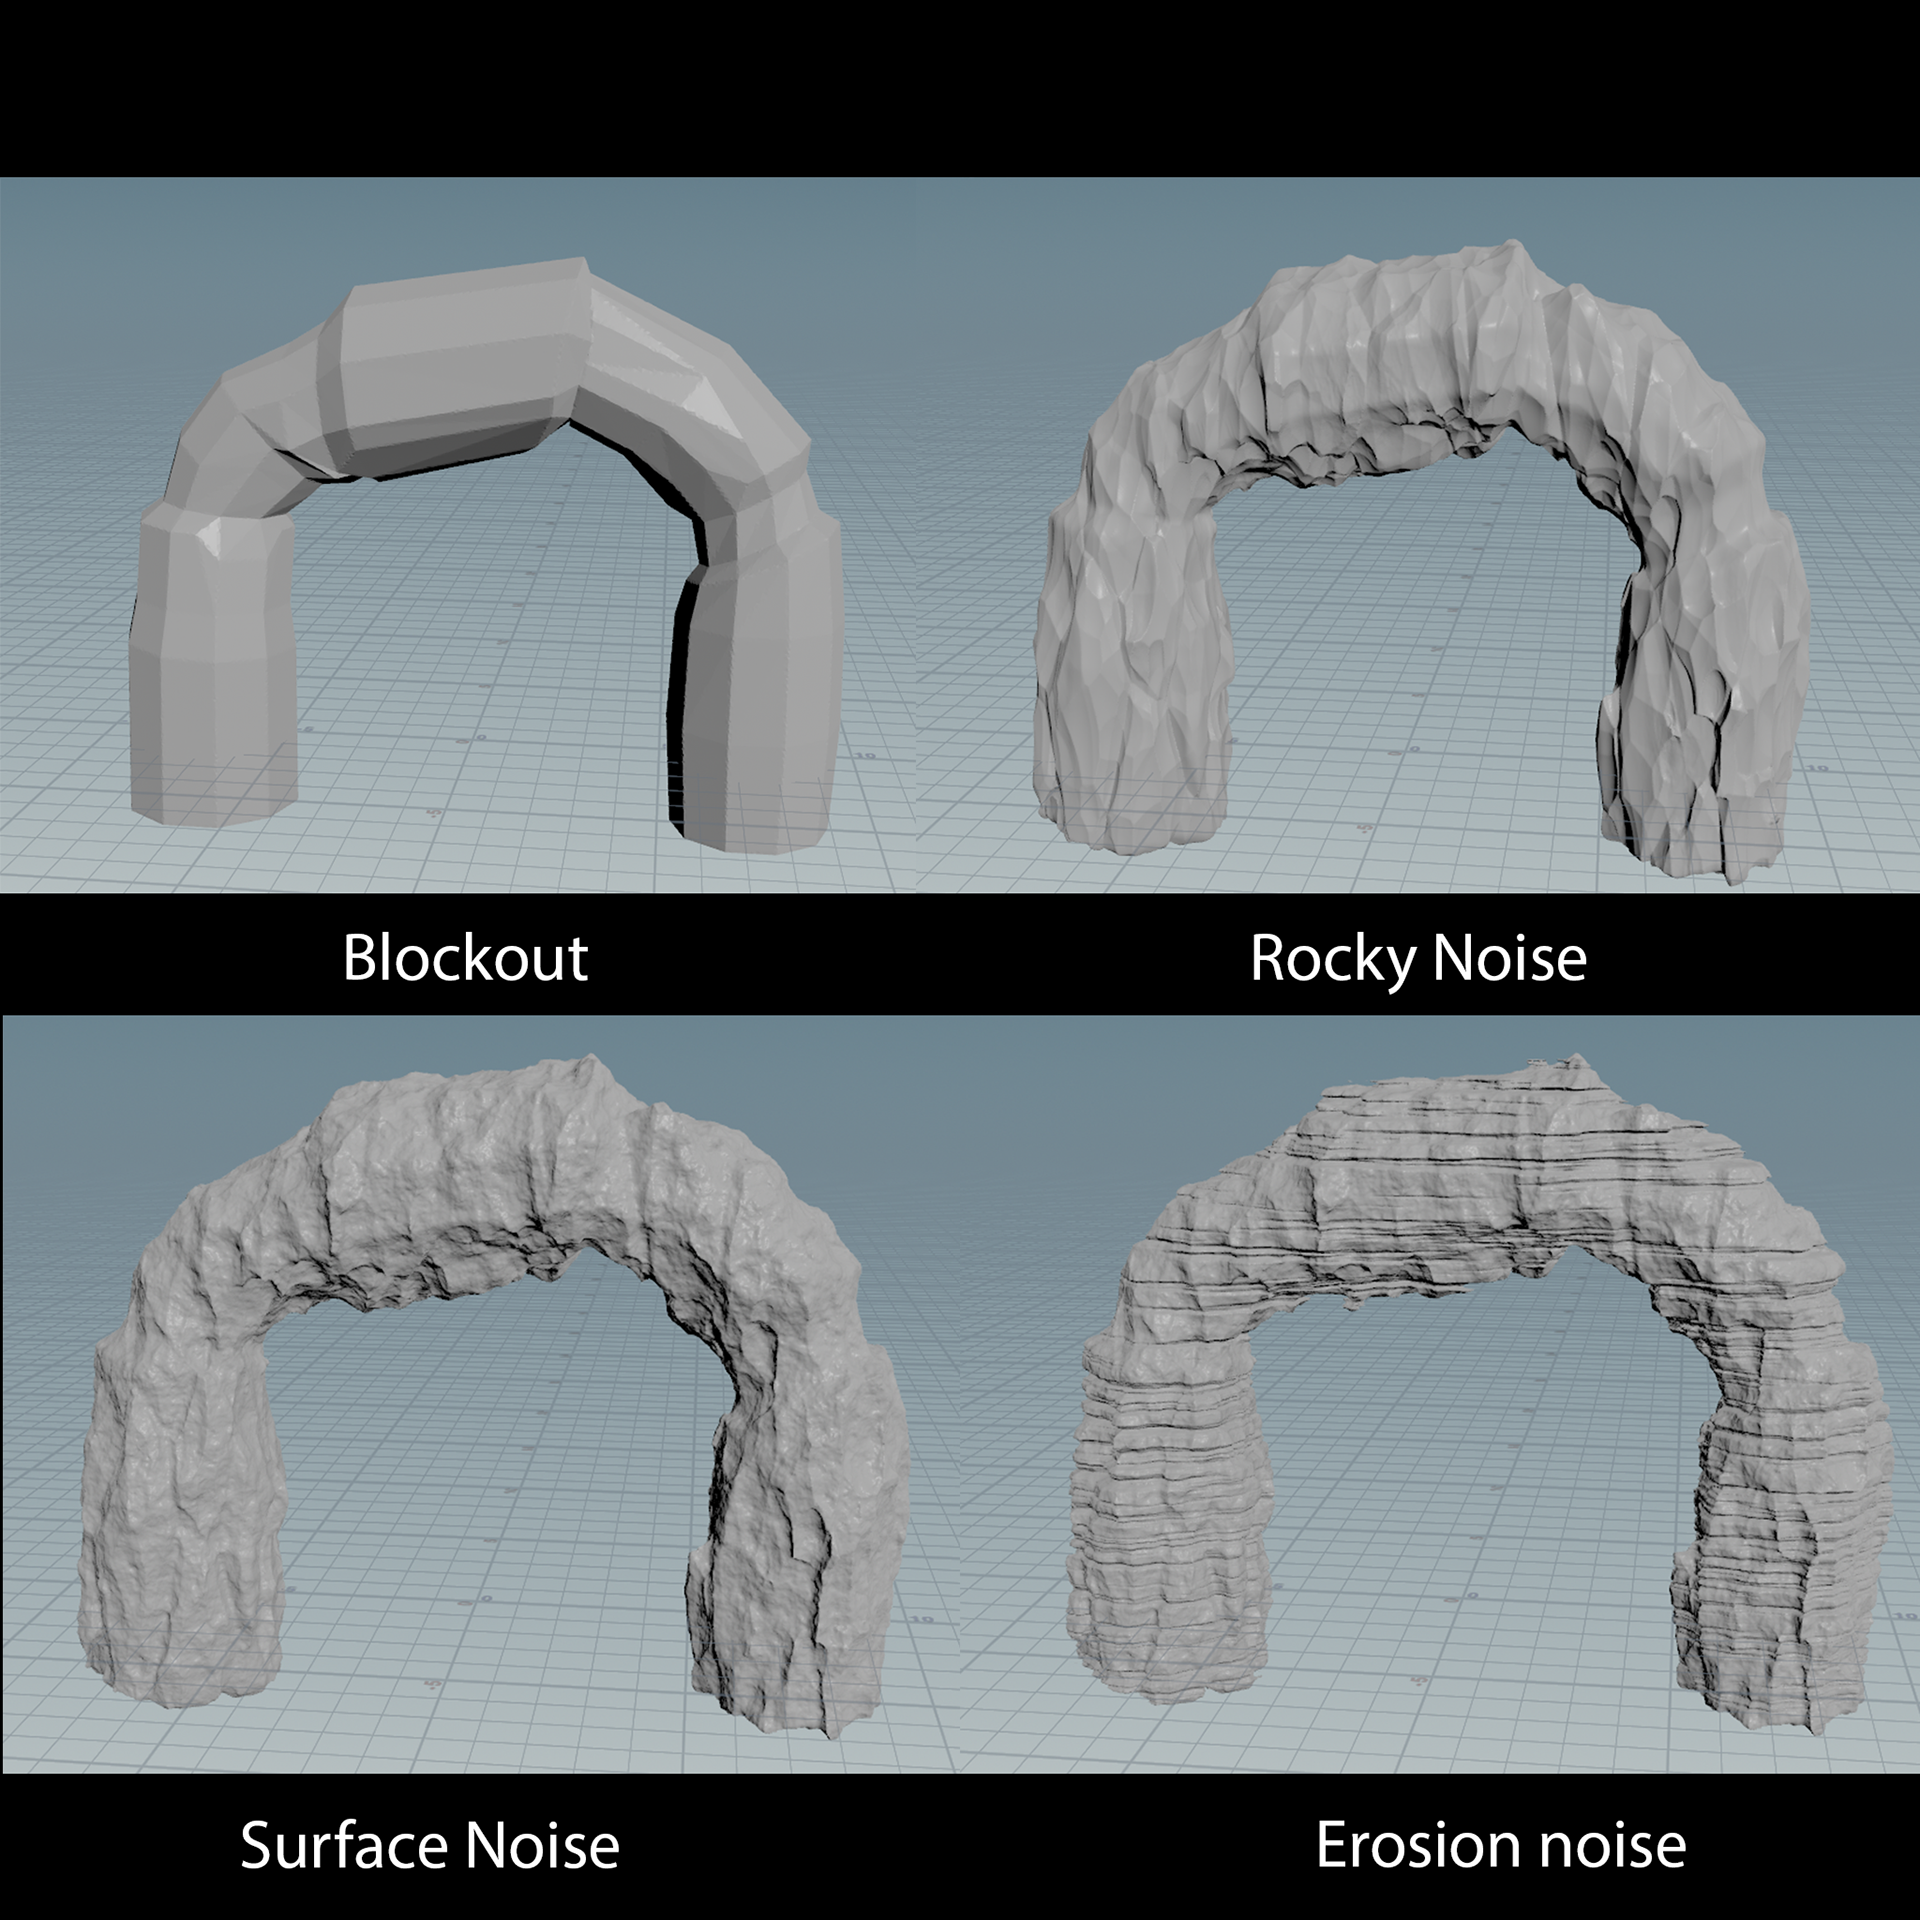
Once we had the VDB, we could create and mix different types of 3D noise. To get a good result, I used three layers of VDB VOPs to manipulate the volume's density with different noises.
The first layer consisted of an erosion noise, created with a stretched texture to resemble a strata-like erosion effect.
The second layer was a rock-shaped Worley noise with many stacked layers. This was the most difficult and critical noise to get right.
The third layer consisted of general surface noise, which was a simple Perlin noise.
The order in which these noises were applied to the VDB was surprisingly important. The more noise I added after the erosion layer, the more believable that part of the model became.
The order in which these noises were applied to the VDB was surprisingly important. The more noise I added after the erosion layer, the more believable that part of the model became.
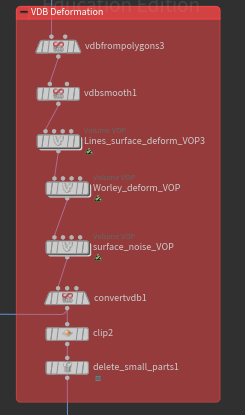
The different types of noise were mixed together by applying additions, subtractions, and multiplications, along with clamp and fit nodes to adjust the volume's density.
While I learned a lot about volumes during this project, understanding how the noises affected the mesh after mixing was still challenging. Much of the result came from trial and error, especially as I delved deeper into the volume VOP network. One node that was particularly helpful in this process was the fit node.

VOP noise blending
Texturing
Once the noises were applied to the VDB, I converted the volume back to a mesh and began working on the textures.
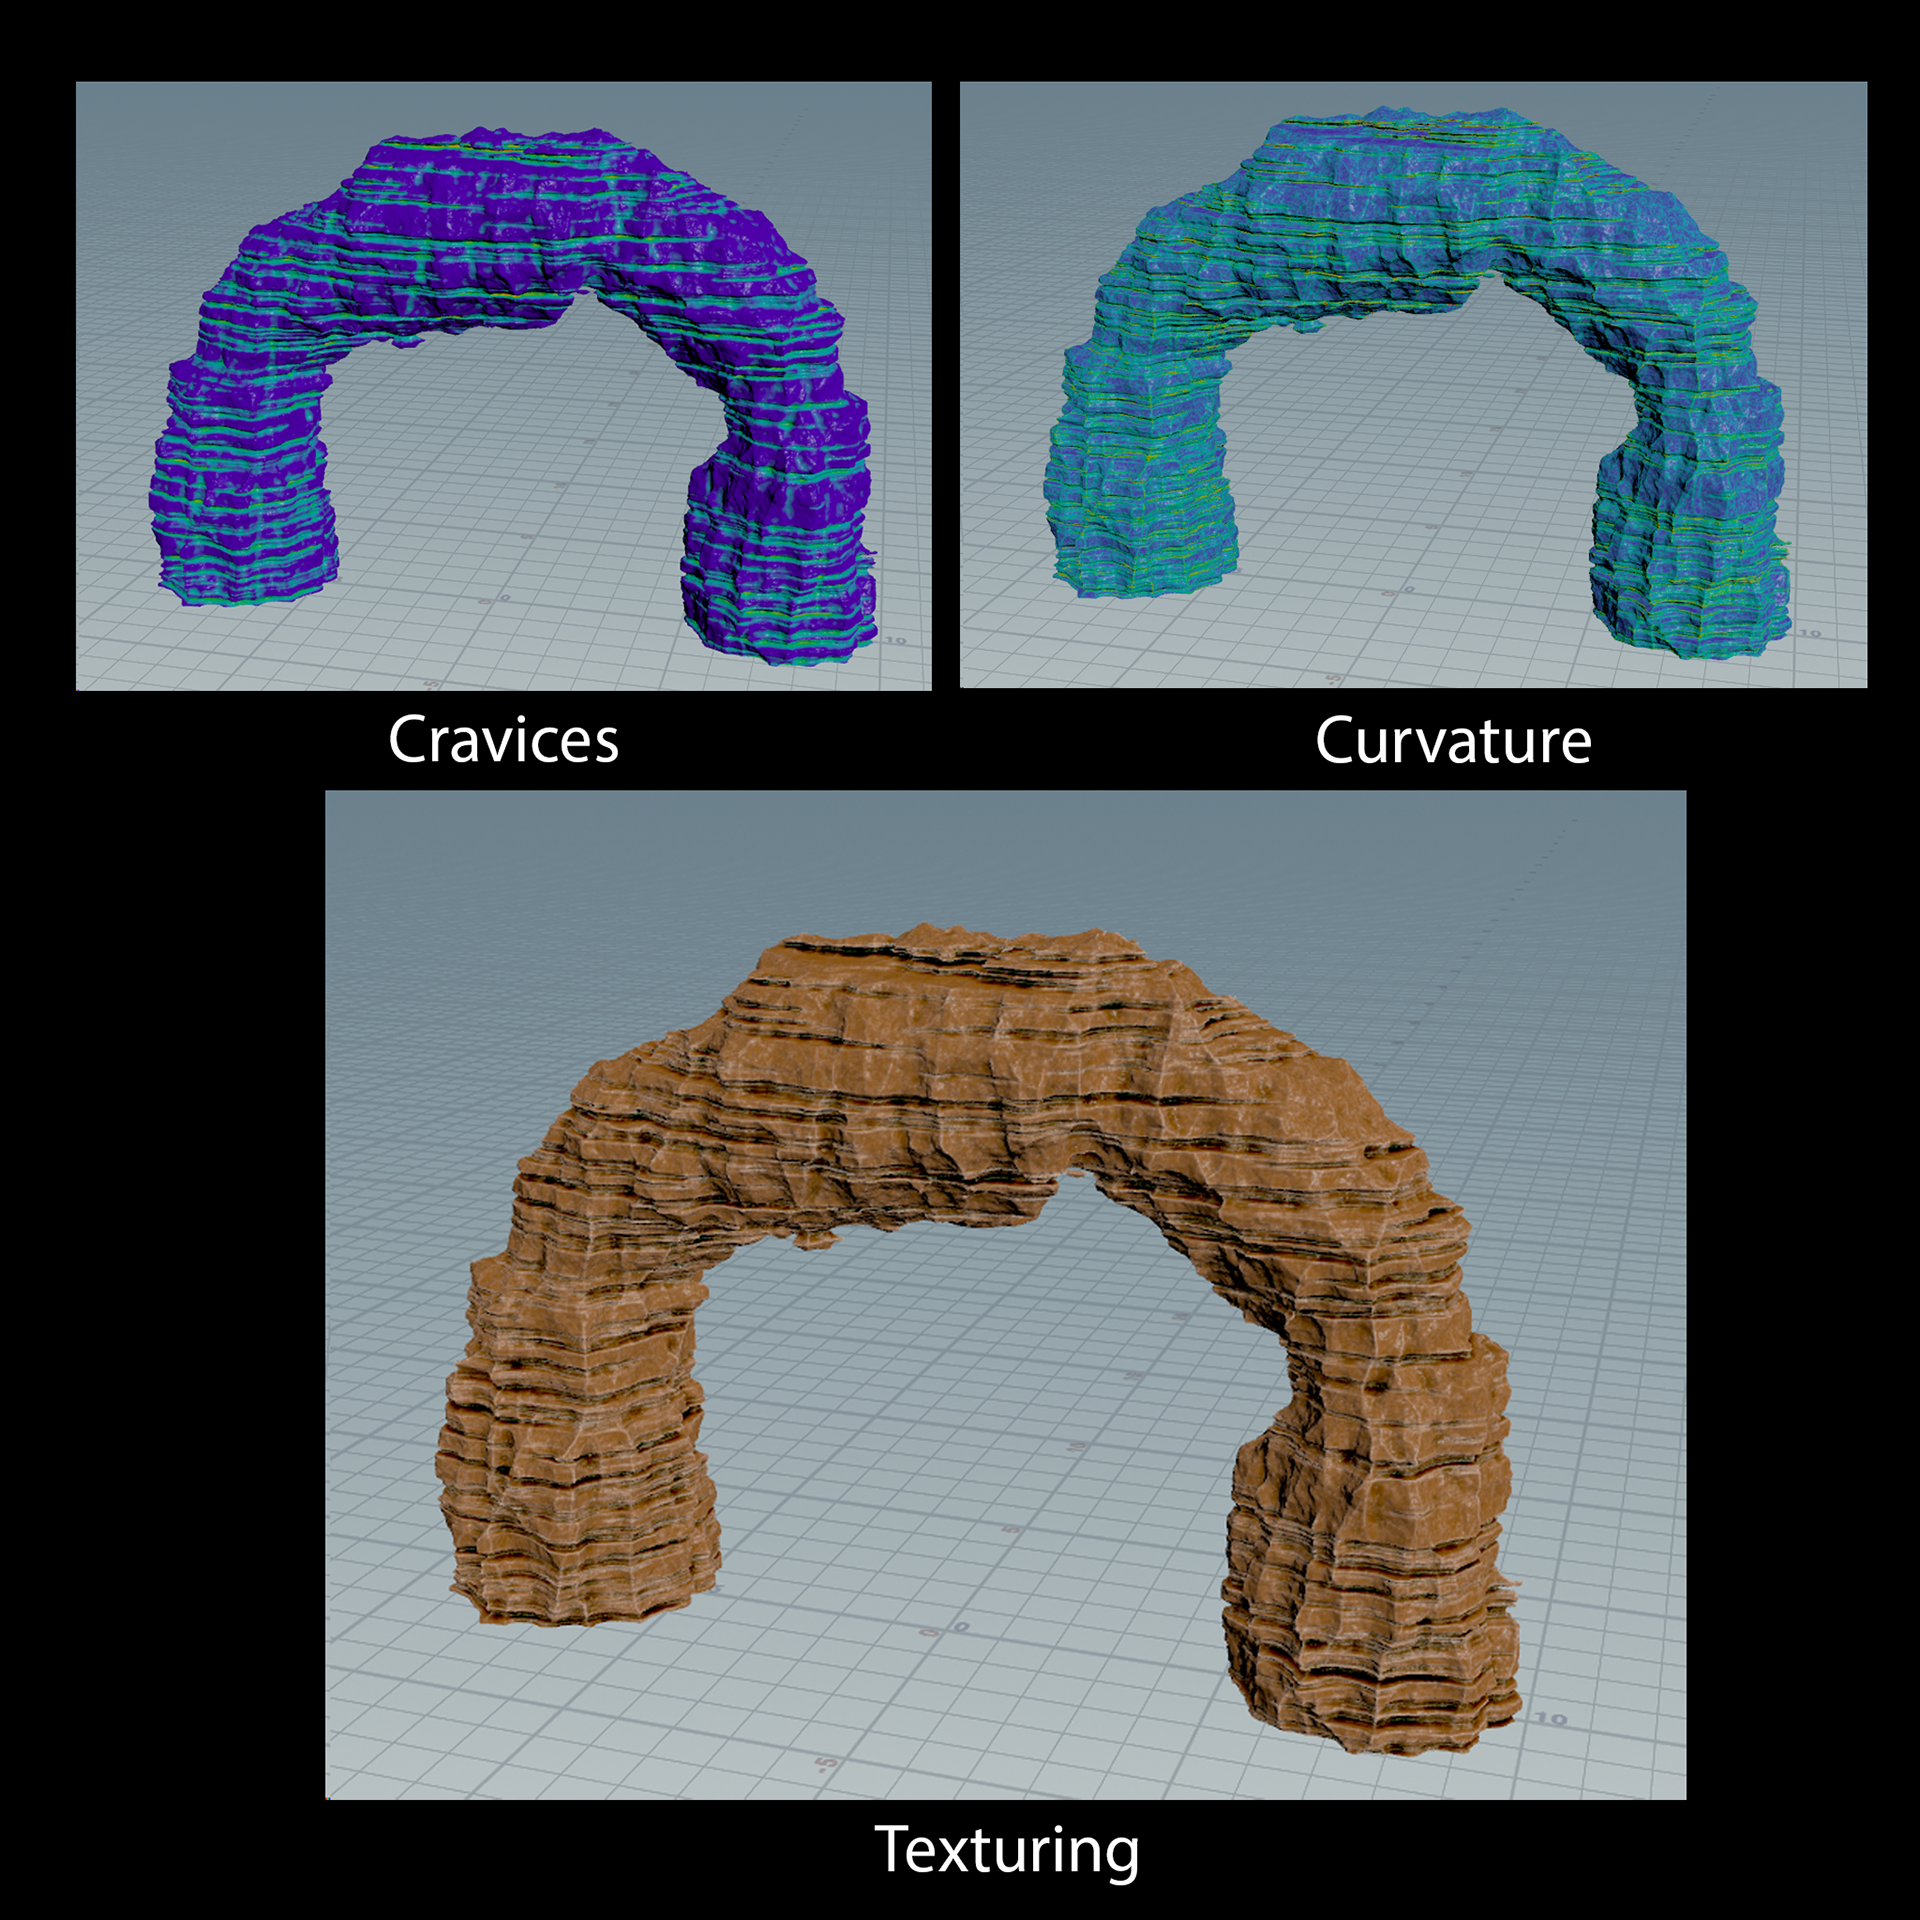
I started by creating masks for the textures using curvature, ambient occlusion, and noise on the model. Vertex colors were then set based on user input. One challenge with using vertex colors and baking them to a texture is that the mesh requires a high level of geometry to achieve good texture quality. A better solution would be to generate textures using Houdini COPS. Alternatively, baking relevant masks and setting up smart materials in other software, such as Substance Painter, could be more efficient.

Base
Curvature
Cravices
Dust
Finally, a low-poly version is generated from the high-poly model, and the details are baked down. Unfortunately, due to time constraints, I chose not to spend too much time implementing an optimal system for this. The result using the auto options is acceptable, but if I had more time, I would focus more on this area, as some of the shape and outline of the low-poly model was lost. Perhaps I could pin certain areas during the re-mesh process using a mix of masks I generated earlier, but first further research would be needed.
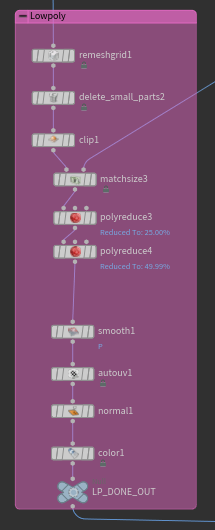
Low poly generation
The result
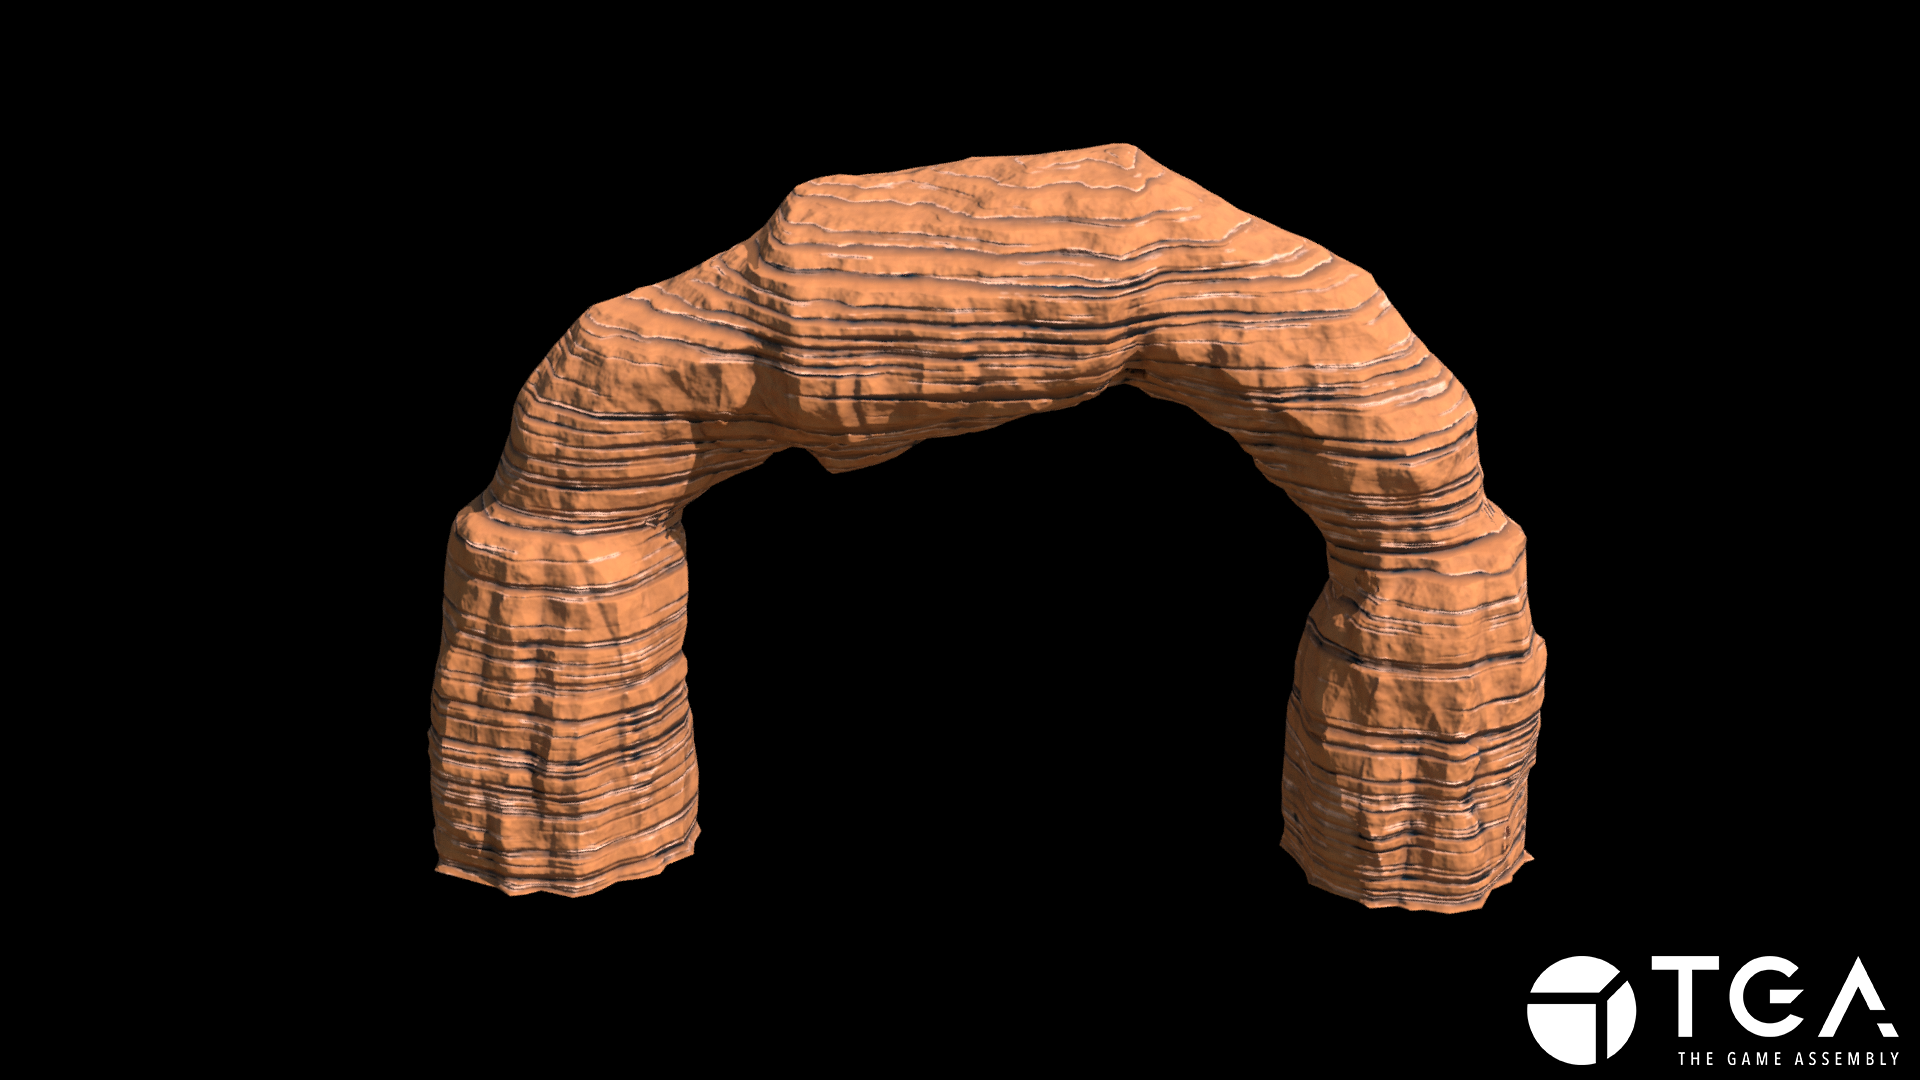
Baked low-poly 6k tris